Subdivided column menu (or Mega Menu) in WooCommerce has a great significance for product navigation. It allows you to view products by categories with images and links under the main menu item.
The process of creating a subdivided column menu in WooCommerce is not that tough, if you use a premium plugin or extension. However, doing it for free could be a tough task if you don’t walk on the right path.
No Worries, we bring you a simple way to add subdivided column menu in WooCommerce with Elementor and ElementsKits.
To begin the process, create some product categories and add them to the menu. However, if you are not familiar with this menu customization process, read our guideline on how to add product categories in the WordPress menu.
How to Add Subdivided Column Menu in WooCommerce With Elementor
Adding a subdivided menu in WooCommerce with Elementor is really a fun and easy process to follow. So, let’s not talk anymore and get started with the customization right away.
Plugin Required
- Elementor
- ElementsKit
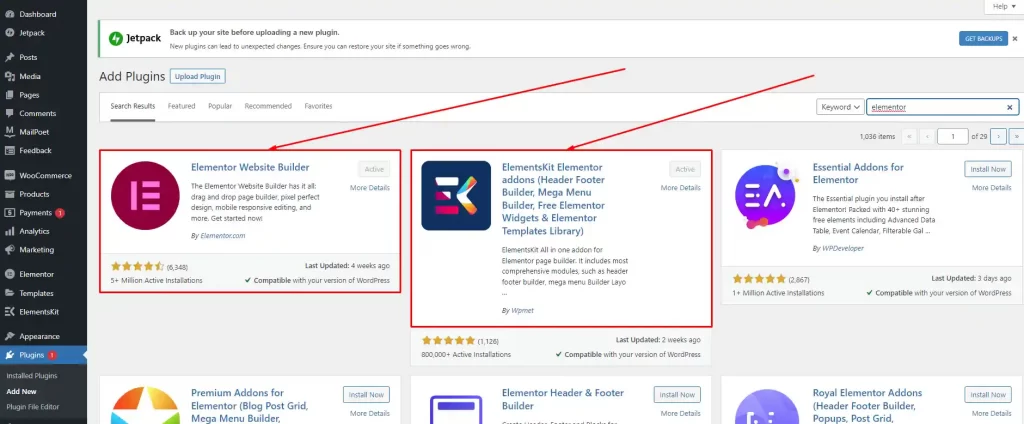
Go to WordPress Dashboard>Plugins>Add New. Search by the name ‘Elementor & ElementsKit’. Install & activate both the plugins.
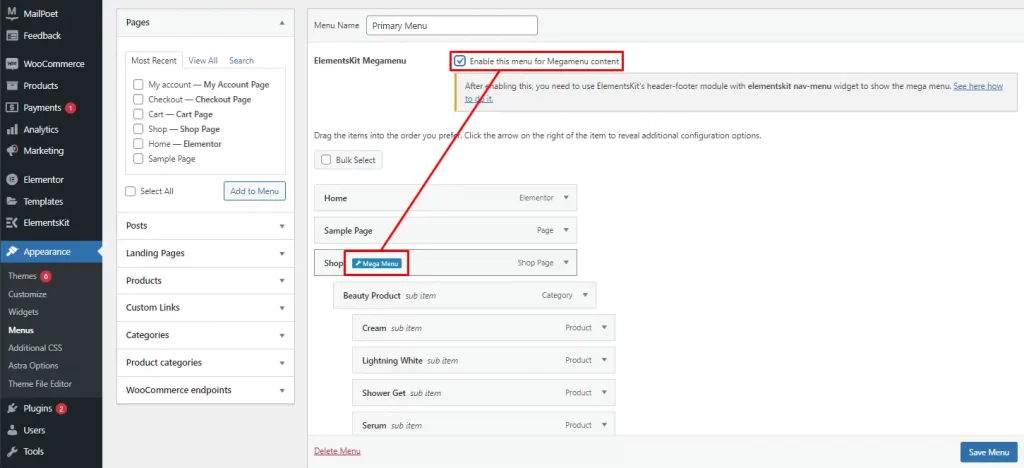
Step 1: Now, you will have the Enable Mega Menu option in the WordPress default menu. So, go to WordPress Dashboard>Appearance>Menus, select a menu, and tick the checkbox ‘Enable this menu for Mega Menu content’. Hit the ‘Save Menu’ button.
We have done this for our Primary Menu and are going to create a mega menu under the shop menu item. So, let’s click on the ‘Mega Menu’ option in the shop menu item.
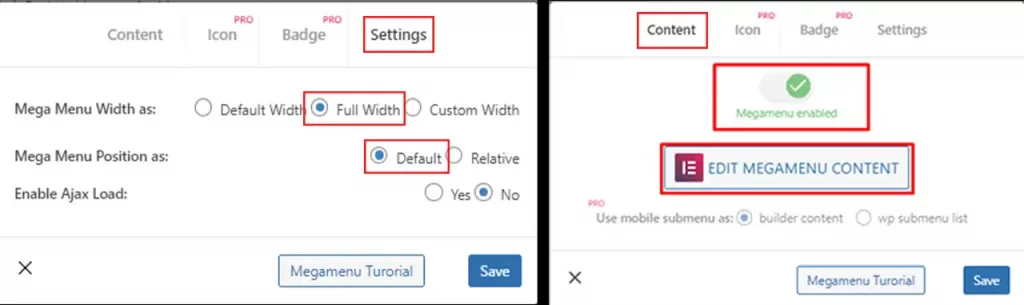
Step 2: A window will appear where you need to make some changes for the Settings & Content tabs. Do the changes below and save it.
In the ‘Settings Tab’
- Mega Menu Width as: Full Width
- Mega Menu Position as: Default
- Save
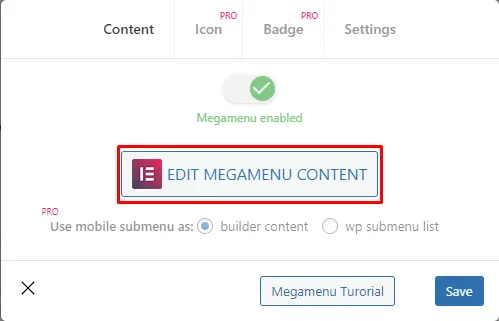
In the ‘Content Tab’
- Enable Megamenu
- Click on the Edit Mega Menu Content
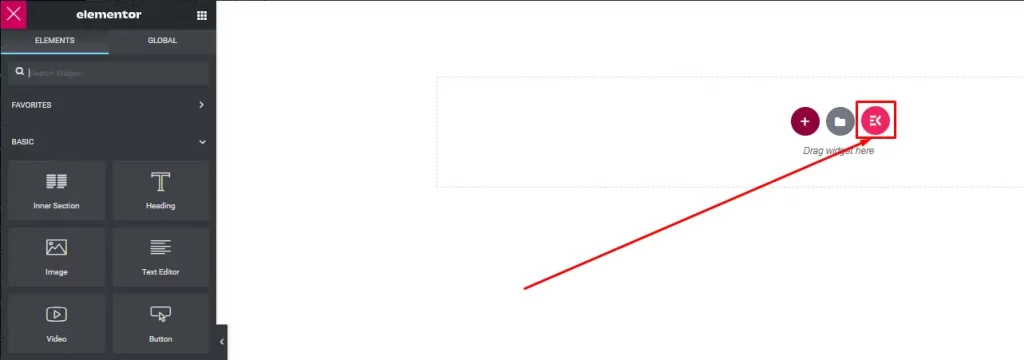
Step 3: Use the ElementsKit option to add a mega menu template.
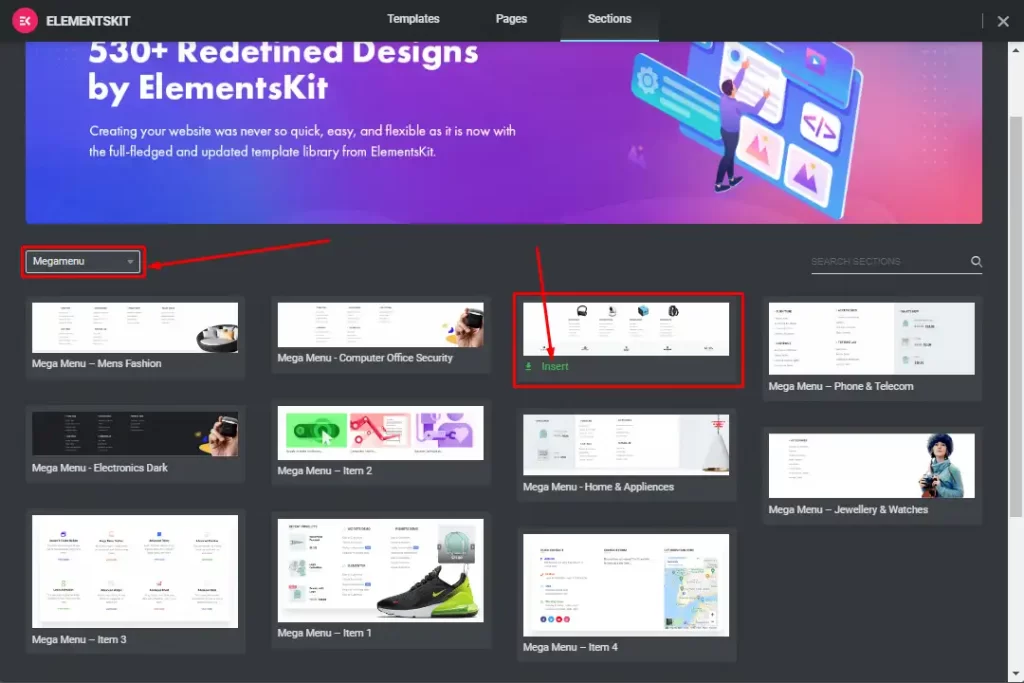
Step 4: Choose the ‘Mega Menu’ category from the Sections tab and insert a template.
Note: Make sure you select a free template otherwise you cannot use that without purchasing.
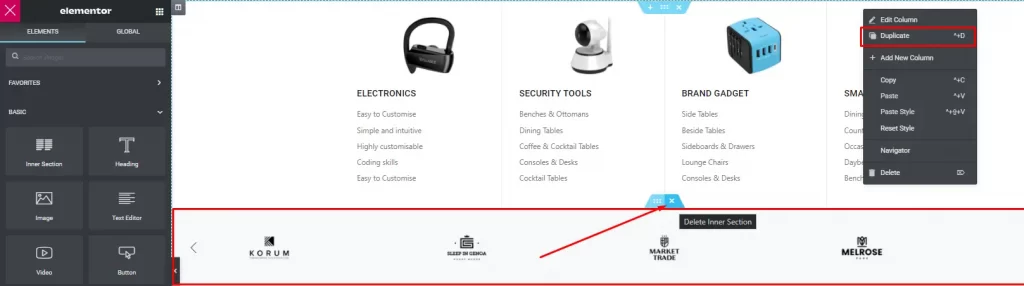
Step 5: The template we selected has four columns and an ads section. You can add or remove columns as the design needs. Also, we will delete the Ads section because we don’t need that.
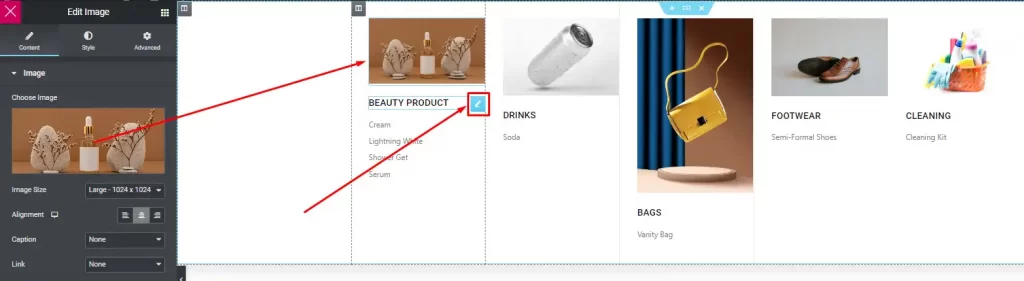
Step 6: Use the edit button to replace or remove column materials such as the image, text, links, and so on. Do the same for each column and update when done. Close it, go back and save again.
Subdivided column menu creation is done but it won’t be visible without creating a header section using the ElementsKit. So, move on to step 7.
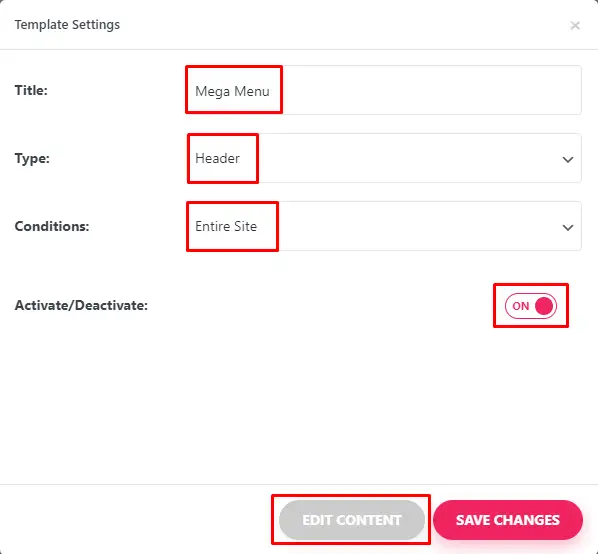
Step 7: Now, go to WordPress Dashboard>ElementsKit>Header Footer and click on the Add New option. Make changes as below;
- Title: Mega Menu (Name it as you want)
- Type: Header
- Conditions: Entire Site
- Activate/Deactivate: On
- Hit the ‘Edit Content’ button
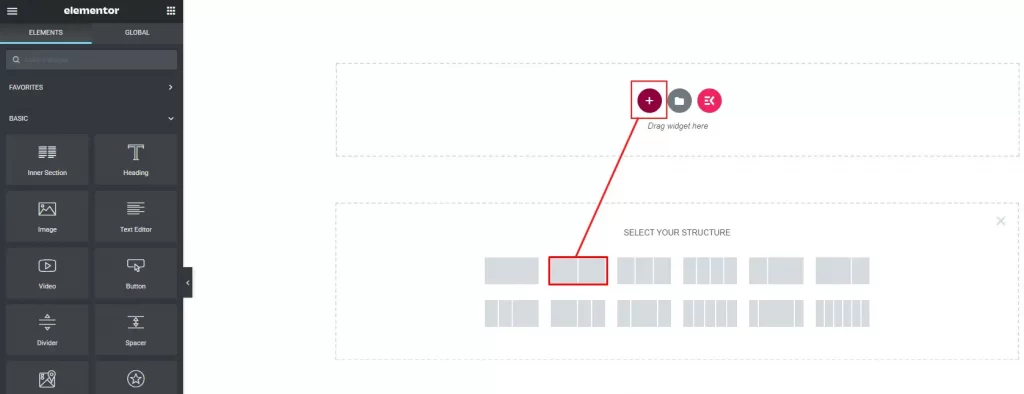
Step 8: In the Edit Content window, we are adding a section layout of 2 columns.
Step 9: Hit the ‘+’ icon from each column to add elements. We are adding a logo in the 1st column and ElementsKit Nav Menu in the second column.

Step 10: Make changes in the Navigation Menu Settings as below;
- Select Menu: Primary Menu (Created before with Mega Menu)
- Horizontal Menu Position: Right
- Dropdown Open As: Hover
- Enable One Page: No
- And, hit the ‘Update’ button to save
Exit from ElementKits and go back to the site. See the final view.

How to Build a Subdivided Menu in WooCommerce From Scratch with Elementor
Up until now, we have added a WooCommerce subdivided column menu using a premade template. Now, we will do it from scratch without any template.
Step 1 and step 2 will be the same as above. Hit the ‘Edit Megamenu Content’ button to proceed.
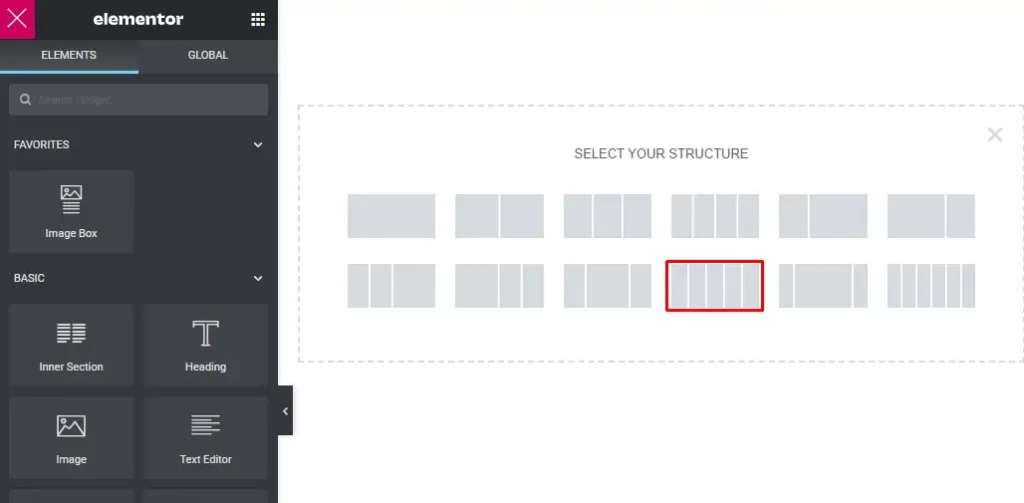
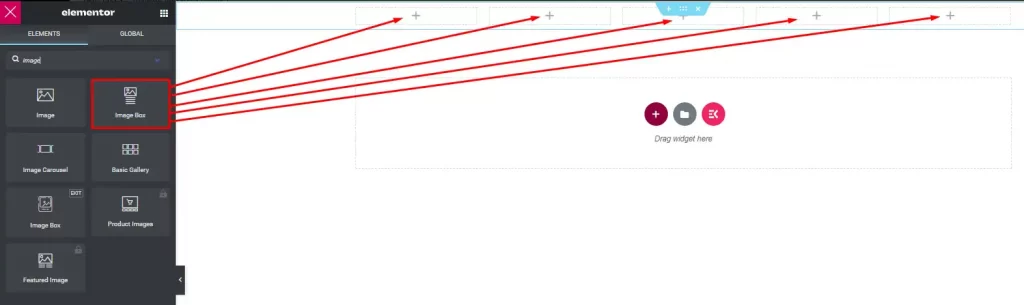
Step3: Add a section of 5 columns to create a subdivided column menu from scratch.
Step 4: Here, we add an Image Box for each column.
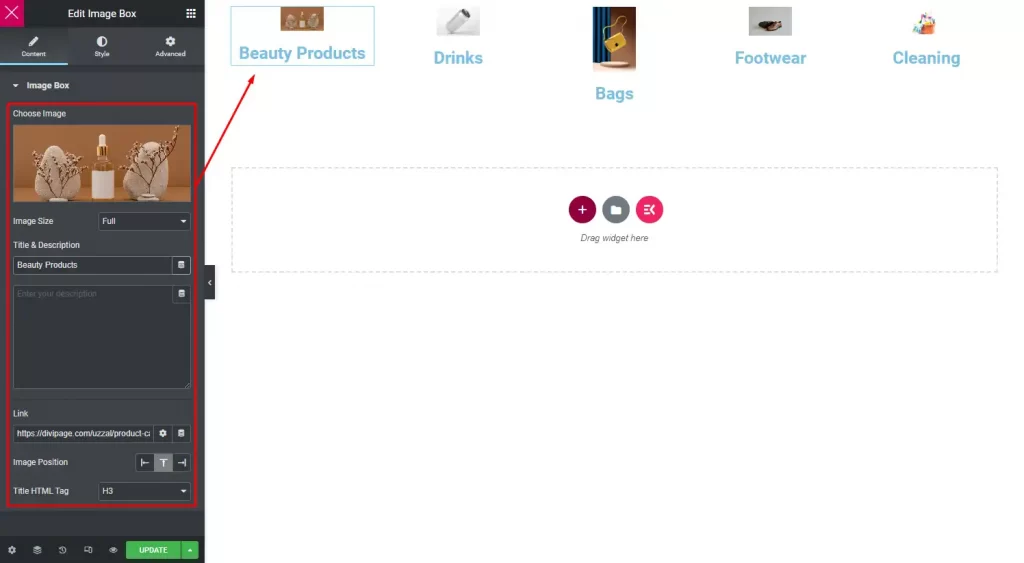
Step 5: By default the image box comes with some design materials. We edit each column individually by those materials;
- Image: Use an image
- Title: Product category Name
- Link: Product category link
- Description: No description
Update and close the window. Save from ‘Edit Megamenu Box’ and hit ‘Save Menu’ from WordPress Menu.
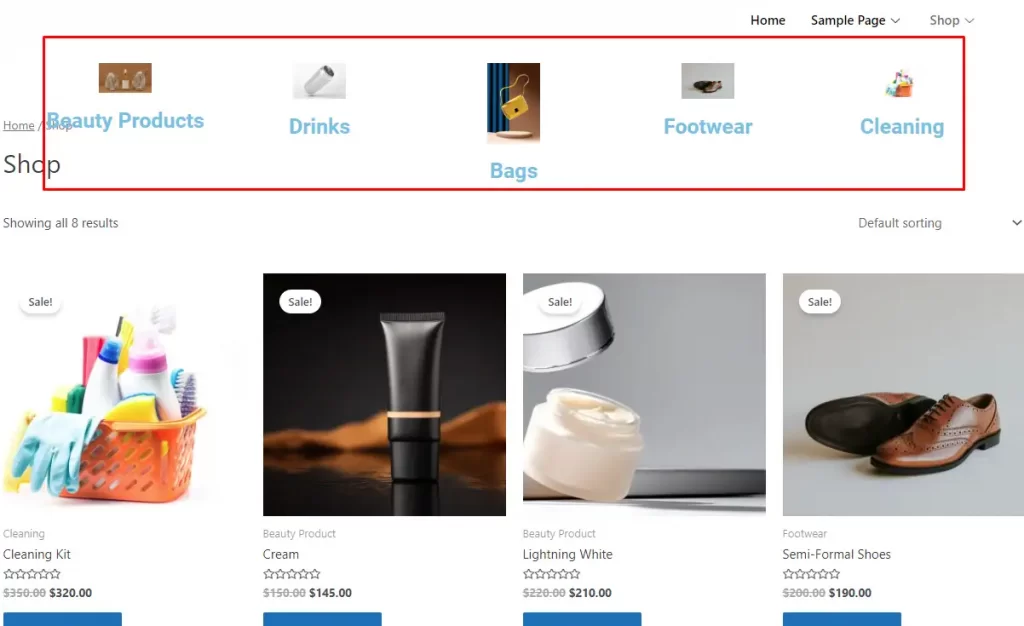
The subdivided column menu is ready but we need to create the header section using ElementsKit to call the menu. So, we follow step 7 to step 10 as mentioned above.
Visit website and see how it looks;
Final Verdict
Both ways of creating the subdivided column menu are effective but, I suppose using the free template is more efficient. Well, a subdivided column menu from scratch may seem less alluring but it will be different than others.
Hope this article was helpful. Leave your precious comment about your experience creating subdivided column menus and which one you think is better.
FAQ
What is WooCommerce Subdivided Column Menu?
The WooCommerce Subdivided Column Menu is a two dimensional multi-column dropdown menu where several product categories are displayed. Plus, you can add images and links in the categories to enrich it.
How do I create a multi column menu in WordPress?
You can create a multi column menu in WordPress/WooCommerce using several premium plugins and themes. However, if you plan to do it without spending money, we suggest you go with Custom CSS and do it yourself.
What is a mega menu WooCommerce?
Mega Menu WooCommerce is a greater form of subdivided column menu to navigate products by categories. This is an advanced look of regular menu navigation with better accessibility and filtering by categories.
How do I create a mega menu in WooCommerce?
You can use plugins such as ElementsKit, Max Mega Menu, etc. Follow our article to add a mega menu in WooCommerce for free.
What are the sub menu options?
There are 3 types of sub menu and they are;
1. Mega Menu
2. Flyout Menu
3. Stack Menu